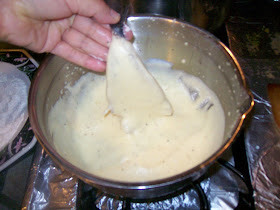
Don't know a proper english translation but it's basically scrambled eggs with minced tomato, onion, chili pepper, seasoned with salt and pepper, topped with cilantro
My mother say's there are several versions of "Huevos Rancheros" depending where your from in Mexico, your preference, etc. she say's some cooks will sautee the tomato, chile pepper, and cilantro with salt and pepper then set aside on a plate, then fry a tortilla place on top, then cook the eggs however they prefer and place on top like a layer thing, etc.
Ingredients:
-6 eggs (beaten with a small splash of milk)
-1/2 onion minced
-1 green chile pepper minced (we use Serrano or Jalapeño)
-1 small roma tomato minced (or 1/2 a big tomato)
-salt and pepper to taste
-1/2 a bunch more or less to taste of minced cilantro leaves (washed of course)
-oil to cook (whatever you want traditionally lard is used, my mom likes to use olive oil for most things though you can use any neutral flavored oil to)
Directions:
(1)Heat a pan on medium high heat with oil or lard, when oil is hot enough add minced onion and chili pepper, sautee until onions are lightly caramelized and a bit translucent (shouldn't take forever maybe 10 minutes at MOST)
(2)Add roma tomato and continue to cook until tomato releases juices and cooks down a bit (a couple minutes) season with salt and pepper to taste.
(3)Add beaten eggs swoosh around to mix, let it as the egg cooks from edges just slide it with spatula so raw egg can flow and cook, cook until eggs are fully cooked, you can add more salt and pepper to taste if you want but usually my mom heavely adds it prior to adding eggs so the sautee is salty enough to flavor eggs.
(4)Now turn off heat and top with minced cilantro.
(5)Serve however you'd like, there's no rules to how to enjoy it :) traditionally though maybe some corn tortillas, refried beans, hot sauces on the side, and a hot coffee with milk. I wasn't to hungry so I just ate a little with 2 tortillas and a glass of milk.
NOTE:
-My mother told me some people like to add chunks of red bell pepper to this, etc her preference is not to do that.
This blog is to share what I like and know how to cook. Anything from Mexican recipes taught to me by my mother to old fashioned traditional Cuban (Pre- Castro) and Spaniard cooking taught by my grandmother. Simply because it is what I've been exposed to. I learn plenty from friends, family, and other blogs. However often I wonder into other cuisines I am intrigued of and will share my finds of these. :)
Tuesday, December 30, 2008
Saturday, December 27, 2008
Tortillas de Harina (Flour Tortillas)
In case you don't know about "flour tortillas" (I assume almost everyone knows but just in case), they are thin, flat, round, flexible type of bread, it is used in Mexican Cuisine to make "Burritos", and also to eat with food the same way you eat "Corn Tortillas" (which is made from corn "masa" treated with a lime solution to release the corns nutrients)
The homemade flour tortillas hot from the griddle (comal) are delicious when spread with butter, dusted with sugar, rolled and enjoyed with hot coffee or milk or even a hot chocolate for a late night snack or breakfast.
I am not a fan of buying flour tortillas from the store because they use "shortening" and other hydrogenated fake oils sometimes "margarine" which I dislike :) so I rather have them only when homemade with either lard or butter as the fat. My mother uses butter because she loves the buttery taste, and say's it makes the tortilla more flexible.
I never really knew exactly how to make them until today, I knew what went into making them but not the proportions.
Ingredients:
-5 cups all-purpose flour (La Piña brand is the one we use)
-1 tablespoon baking powder
-1/2 tsp. salt
-1 stick butter about 1/2 cup (preferably unsalted but if you have salted it's okay to)
-2 cups hot water (more or less we used 2 but until it get's right consistency)
Directions:
(1)Fill a medium pot with water and bring to a boil while waiting do the rest (fill it with plenty of water more than you need better to be safe than sorry than having boiled water then you find you need more later so boil atleast 4-6 cups even though I just ended using 2) turn off heat it should be at a bare boil like hot but not bubbling when you add it to flour.
(2)Add flour, baking soda, and salt in a large bowl, mix with hand by swooshing around.
(3)With your hands add pieces of butter you rip off by hand and place into the flour, then with your hands rub and crumble together with flour until you get a crumbly texture but be sure to not have any big lumps of flour. Rub the flour well with butter.
(4)With a wooden spoon mix flour as you add water little by little and stirring until the dough becomes like a ball but is still sticky it will stick somewhat to hands and that is normal.
(5)Move to a flat surface with flour (in my case the kitchen counter) and work the dough dusting with flour occasionally until it doesn't stick to your hands (it was floured like 4 times and worked for about 5-10) until the dough is soft. Let dough rest atleast 10 minutes, it is optional to let the dough rest my mother usually doesn't but it makes it better. Also a trick my mom uses to know if she worked the dough enough is she cuts a big opening with the knife and if there's like a slight circle bubble thing on the dough that looks like a dip dot or something like that then it's ready the baking powder has activated also (or whatever I don't know the science of this stuff.)
(6)Divide dough into medium round balls, flatten out and round with a rolling pin or cup on a very lightly floured surface.
(7)Have a hot griddle ready that has been heating for about 5 minutes of medium high heat to high heat, add tortilla flat on to the hot griddle until it bubbles a bit or poofs then flip, it just has to slightly change color on one side. Then set into a container or in my case a "Tortillera" ( a type of container made of yarn and wood with a cloth and styraphoam inside to keep them warm and sealed.)
IMPORTANT TIPS AND NOTES:
(1)Be careful not to add to much flour when working the dough or you will get dry tortillas, and also don't add to much water either it has to be just right.
(2)Be sure the griddle is hot enough it the griddles heat is to low you will end up "toasting" the tortillas and they will not be flexible.
(3)These tortillas can last up to 1 week sealed well in the fridge, the prepared dough can last up to 2 day's wrapped in plastic in the fridge.
(4)I didn't cook these I was simply observing my mother and told her to please measure so I can learn ha ha. Because she makes these but it's always eye balled so I never really learn or wouldn't be able to share.
(5)A good tortilla will puff then disinflate if it doesn't then it isn't that good.
(6)Things like making breads and stuff is more about texture, etc. so if something doesn't feel right follow your instincts and if you mess up it will be your fault ha ha just kidding, well the measurements used worked fine for use as well as the technique.
(7)You can make them as big or small as you want and as thin or fat as you want.
(8)Most importantly USE COMMON SENSE this is really important when working with bread, if it seems to sticky slowly add more flour to get the right consistency, if it looks to dry then add a little more water, feel the dough in your hands to see if it feels right.
The homemade flour tortillas hot from the griddle (comal) are delicious when spread with butter, dusted with sugar, rolled and enjoyed with hot coffee or milk or even a hot chocolate for a late night snack or breakfast.
I am not a fan of buying flour tortillas from the store because they use "shortening" and other hydrogenated fake oils sometimes "margarine" which I dislike :) so I rather have them only when homemade with either lard or butter as the fat. My mother uses butter because she loves the buttery taste, and say's it makes the tortilla more flexible.
I never really knew exactly how to make them until today, I knew what went into making them but not the proportions.
Ingredients:
-5 cups all-purpose flour (La Piña brand is the one we use)
-1 tablespoon baking powder
-1/2 tsp. salt
-1 stick butter about 1/2 cup (preferably unsalted but if you have salted it's okay to)
-2 cups hot water (more or less we used 2 but until it get's right consistency)
Directions:
(1)Fill a medium pot with water and bring to a boil while waiting do the rest (fill it with plenty of water more than you need better to be safe than sorry than having boiled water then you find you need more later so boil atleast 4-6 cups even though I just ended using 2) turn off heat it should be at a bare boil like hot but not bubbling when you add it to flour.
(2)Add flour, baking soda, and salt in a large bowl, mix with hand by swooshing around.
(3)With your hands add pieces of butter you rip off by hand and place into the flour, then with your hands rub and crumble together with flour until you get a crumbly texture but be sure to not have any big lumps of flour. Rub the flour well with butter.
(4)With a wooden spoon mix flour as you add water little by little and stirring until the dough becomes like a ball but is still sticky it will stick somewhat to hands and that is normal.
(5)Move to a flat surface with flour (in my case the kitchen counter) and work the dough dusting with flour occasionally until it doesn't stick to your hands (it was floured like 4 times and worked for about 5-10) until the dough is soft. Let dough rest atleast 10 minutes, it is optional to let the dough rest my mother usually doesn't but it makes it better. Also a trick my mom uses to know if she worked the dough enough is she cuts a big opening with the knife and if there's like a slight circle bubble thing on the dough that looks like a dip dot or something like that then it's ready the baking powder has activated also (or whatever I don't know the science of this stuff.)
(6)Divide dough into medium round balls, flatten out and round with a rolling pin or cup on a very lightly floured surface.
(7)Have a hot griddle ready that has been heating for about 5 minutes of medium high heat to high heat, add tortilla flat on to the hot griddle until it bubbles a bit or poofs then flip, it just has to slightly change color on one side. Then set into a container or in my case a "Tortillera" ( a type of container made of yarn and wood with a cloth and styraphoam inside to keep them warm and sealed.)
IMPORTANT TIPS AND NOTES:
(1)Be careful not to add to much flour when working the dough or you will get dry tortillas, and also don't add to much water either it has to be just right.
(2)Be sure the griddle is hot enough it the griddles heat is to low you will end up "toasting" the tortillas and they will not be flexible.
(3)These tortillas can last up to 1 week sealed well in the fridge, the prepared dough can last up to 2 day's wrapped in plastic in the fridge.
(4)I didn't cook these I was simply observing my mother and told her to please measure so I can learn ha ha. Because she makes these but it's always eye balled so I never really learn or wouldn't be able to share.
(5)A good tortilla will puff then disinflate if it doesn't then it isn't that good.
(6)Things like making breads and stuff is more about texture, etc. so if something doesn't feel right follow your instincts and if you mess up it will be your fault ha ha just kidding, well the measurements used worked fine for use as well as the technique.
(7)You can make them as big or small as you want and as thin or fat as you want.
(8)Most importantly USE COMMON SENSE this is really important when working with bread, if it seems to sticky slowly add more flour to get the right consistency, if it looks to dry then add a little more water, feel the dough in your hands to see if it feels right.
Sardinas Lambriadas (Fluffy Egg Battered Sardines)
In Mexican cooking there is a very commonly used egg batter used for many many things, it is fluffy yet has body. It is most well known as a coating for "Chile Rellenos" (Mexican stuffed Pasilla Chiles), and can be used for Cauliflower like in my recipe "Cauliflor Envuelta en Huevo" and also for "Calabasitas Rellenas de Queso" (cheese stuffed squash) it is used for other dishes to, that I will post in the future.
Today I am gonna show you how to use it to prepare Sardines, it is very delicious and simple, it is my favorite way to prepare fresh sardines (aside from the canned one's packed in tomato sauce I love them to make "Sardinas en Salsa Criolla" (Cuban Creole sauce)
In this recipe sardines are butterflied, salted and peppered then coated in batter and fried. If you love sardines I really suggest you try the recipe after all the ingredients used in it are stuff that can be found in ALMOST ANYBODY'S PANTRY and FRIDGE.
Main Ingredients:
-1 1/2 lbs. fresh sardines
-a little bit of salt (just enough to very lightly season the fish)
-a little bit of pepper (just enough to very lightly season the fish)
-flour to dust fish
Batter Ingredients:
-3 egg whites
-3 egg yolks
-1/2 tsp. salt
-1/2 tsp. ground black pepper
-1 tsp. garlic powder (you may use fresh garlic but the powder is better for this)
Directions
(1)Get the sardines, clean them by removing the gills, cutting belly open and removing guts, and scraping any black stuff out. Now remove head (optional to remove head but it looks prettier), butterfly, get your knife and slice spine bone on both sides, then from the top to the bottom run your knife down to remove, when you get near the tail snip of the spine with scissors.
It is fine to have spines left, sardines have very tender spines when cooked they can be consumed.
(2)Now get each fish it should look like the picture, opened up and flat, now LIGHTLY salt and pepper each fish by sprinkling LIGHTLY (I emphasize this because the batter already has salt and is seasoned)
(3)Now get a plate, put some flour on it and set aside
(4)To make batter, separate egg whites from yolks, in a large bowl beat egg whites until stiff and fluffy like meringue, beat in egg yolks, add salt, pepper, garlic powder and beat in. Now your done set aside.
(5)Make your assembly line starting with a plate of seasoned fish, a plate of flour, the batter, and then then a pan with oil enough to pan-fry heated on medium high heat, and finally a plate with paper towels to drain fried fish.
(6)In this order start, get the lightly seasoned fish, dust it with flour, pass it through egg batter holding it from the tail, and then add to the hot oil and when browned on one side flip it when browned on the other until browned on both sides, remove from oil and drain in paper towel, do this in several batches.
(7)Enjoy, serve with lime wedges, or by itself as an appetizer, it can also be eaten as a main dish, just be sure to have at least 2 sardines per person.
NOTE & WARNING:
(1)These are addicting
(2)Any leftover batter just pour into the hot oil and fry like a pan-cake, it is very tasty.
(3)The batter if it sits to long the egg whites start to separate, so when they do just beat it again and continue.
Friday, December 26, 2008
Majuas Fritas o "Pescaito Frito" (Fried Smelt)
I forgot the typical Spanish name for the fish called "Smelt", my mother calls them "Charales" my Tata (grandmother) I forgot what she calls them, but thanks to one of my reader's "Mamey" and asking my Tata recently I found out it's called "Majua"
Well anyways this is a very simple dish, it's just seasoned smelt, dusted with flour then pan-fried or deep-fried your choice. Served with lime wedges.
Main Ingredients:
-1 pound Smelt clean
-4 cloves garlic mashed to paste
-1 tsp. ground cumin
-1/2 tsp. ground black pepper (optional)
-salt to taste
-a little bit of freshly squeezed lime juice (maybe like 1 lime?)
-flour for dusting
-olive oil for pan-frying or a neutral flavored oil for deep-frying that can withstand high heat.
To serve:
-wedged limes to squeeze over
-fresh minced cilantro or parsley to garnish (optional)
Directions:
(1)Rinse the smelt, pat dry, if you wish and are patient you can clean the inside out, etc. but they are small fish, most people just rinse them and prepare as is, my mother is SUPER PICKY about cleanliness, she guts them and everything, you don't have to.
(2)Put smelt in a bowl toss gently with a little bit of freshly squeezed lime juice, salt, pepper, cumin, and garlic.
(3)Heat enough olive oil to pan-fry them, on medium high heat, when oil is hot enough, dust them with flour and lightly fry them until golden on each side in small batches, remove and set aside to drain on paper towels. (If your in a hurry. just heat plenty of oil in a skillet or wok on really high heat, dust them and fry them quickly, I prefer the flavor when they are lightly fried in olive oil on medium high heat, and the oil infuses with the garlic and YUM!)
(4)Serve them as an appetizer or snack, or a simple side. Here's a picture of the one's I put on my plate to eat.
PLEASE NOTE:
(1)This a a very basic way to season fish in Cuban cooking, it's a very simple "adobo" that can be used to season ANY fish then fry it or pan-fry it. Very tasty. The way the fish are seasoned it my grandmother's really basic way to season almost anything that is gonna be just pan-fried, or browned such as meats, etc. (we usually season meats with just lime or bitter orange, garlic, and salt, sometimes with the addition of cumin and sometimes pepper to and depending on what sometimes also oregano.)
Well anyways this is a very simple dish, it's just seasoned smelt, dusted with flour then pan-fried or deep-fried your choice. Served with lime wedges.
Main Ingredients:
-1 pound Smelt clean
-4 cloves garlic mashed to paste
-1 tsp. ground cumin
-1/2 tsp. ground black pepper (optional)
-salt to taste
-a little bit of freshly squeezed lime juice (maybe like 1 lime?)
-flour for dusting
-olive oil for pan-frying or a neutral flavored oil for deep-frying that can withstand high heat.
To serve:
-wedged limes to squeeze over
-fresh minced cilantro or parsley to garnish (optional)
Directions:
(1)Rinse the smelt, pat dry, if you wish and are patient you can clean the inside out, etc. but they are small fish, most people just rinse them and prepare as is, my mother is SUPER PICKY about cleanliness, she guts them and everything, you don't have to.
(2)Put smelt in a bowl toss gently with a little bit of freshly squeezed lime juice, salt, pepper, cumin, and garlic.
(3)Heat enough olive oil to pan-fry them, on medium high heat, when oil is hot enough, dust them with flour and lightly fry them until golden on each side in small batches, remove and set aside to drain on paper towels. (If your in a hurry. just heat plenty of oil in a skillet or wok on really high heat, dust them and fry them quickly, I prefer the flavor when they are lightly fried in olive oil on medium high heat, and the oil infuses with the garlic and YUM!)
(4)Serve them as an appetizer or snack, or a simple side. Here's a picture of the one's I put on my plate to eat.
PLEASE NOTE:
(1)This a a very basic way to season fish in Cuban cooking, it's a very simple "adobo" that can be used to season ANY fish then fry it or pan-fry it. Very tasty. The way the fish are seasoned it my grandmother's really basic way to season almost anything that is gonna be just pan-fried, or browned such as meats, etc. (we usually season meats with just lime or bitter orange, garlic, and salt, sometimes with the addition of cumin and sometimes pepper to and depending on what sometimes also oregano.)
Tuesday, December 23, 2008
Carne Con Chile (Meat in Spicy Sauce)
Carne Con Chile is a very basic Mexican meat dish, it is easy to make. It is made usually from leftover hot salsas prepared or you can make the hot sauce for the dish in particular. You simple brown the meat with salt and pepper or your choice of meat seasoning then brown minced onions, and throw hot sauce so the meat boils in it SIMPLE! (Well atleast for me because we always have container's of homemade hot sauces my mother makes)
I must warn though this is a very spicy dish and makes a very good taco filling, or side dish to any Mexican meal.
Ingredients:
*1 1/2 lbs meat cut into bite sizes (me mother uses beef for this but pork, or chicken is acceptable)
*1 onion minced
*salt and pepper to taste or favorite meat seasoning (my mother uses "Chef Merito Steak & Meat Seasoning" it's a blend of salt, sugar, citric acid, black pepper, cumin, paprika, star anise, msg, onion powder, and oregano it's really tastey and my mom likes it)
*1 recipe for a Mexican Salsa (we happened to have leftover "Salsa de Chile Habanero" which is Habanero hot sauce, that we made with tomatoes instead of tomatillos SEE NOTE AT END OF POST)
Directions
(1)Clean meat, and cut into bite size pieces, my mother cuts it into small strips (the beef)
(2)Heat oil in a pan on medium high heat (my mother likes olive oil but lard is the traditional fat but any other oil will do), add meat and brown, it will release liquid, let it reduce and evaporate and lightly brown meat, add onions and sautee until translucent.
(3)Add home made hot sauce and about 1 cup of water, bring to a boil and simmer 5-10 minutes.
PLEASE NOTE:
(1)If using pork, cut pork into little pieces, add water enough to cover and a little oil, boil until water evaporates and it starts browning and cook as directions for recipe apply.
(2)I WISH I WAS GETTING PAID FOR SUGGESTING THE USE OF "Chef Merito's Steak Seasoning for Meats" unfortunately I'm not but hey I'm being honest here it's what my mom used for this dish.
(3)Here is the list of SOME homemade hot sauces we make in my house that can be used to make a good "Carne Con Chile":
-Salsa de Chile Habanero
-Salsa de Chile de Arbol
-Salsa de Chile Verde
We make more different varieties of hot sauces in my house but these are some that I've already blogged about and that we prepare most frequently.
I must warn though this is a very spicy dish and makes a very good taco filling, or side dish to any Mexican meal.
Ingredients:
*1 1/2 lbs meat cut into bite sizes (me mother uses beef for this but pork, or chicken is acceptable)
*1 onion minced
*salt and pepper to taste or favorite meat seasoning (my mother uses "Chef Merito Steak & Meat Seasoning" it's a blend of salt, sugar, citric acid, black pepper, cumin, paprika, star anise, msg, onion powder, and oregano it's really tastey and my mom likes it)
*1 recipe for a Mexican Salsa (we happened to have leftover "Salsa de Chile Habanero" which is Habanero hot sauce, that we made with tomatoes instead of tomatillos SEE NOTE AT END OF POST)
Directions
(1)Clean meat, and cut into bite size pieces, my mother cuts it into small strips (the beef)
(2)Heat oil in a pan on medium high heat (my mother likes olive oil but lard is the traditional fat but any other oil will do), add meat and brown, it will release liquid, let it reduce and evaporate and lightly brown meat, add onions and sautee until translucent.
(3)Add home made hot sauce and about 1 cup of water, bring to a boil and simmer 5-10 minutes.
PLEASE NOTE:
(1)If using pork, cut pork into little pieces, add water enough to cover and a little oil, boil until water evaporates and it starts browning and cook as directions for recipe apply.
(2)I WISH I WAS GETTING PAID FOR SUGGESTING THE USE OF "Chef Merito's Steak Seasoning for Meats" unfortunately I'm not but hey I'm being honest here it's what my mom used for this dish.
(3)Here is the list of SOME homemade hot sauces we make in my house that can be used to make a good "Carne Con Chile":
-Salsa de Chile Habanero
-Salsa de Chile de Arbol
-Salsa de Chile Verde
We make more different varieties of hot sauces in my house but these are some that I've already blogged about and that we prepare most frequently.
Frijoles Negros Con Epazote
Black beans are popular in some parts of Mexico in most parts though Pinto beans rule. I had heard that Black beans in some parts of Mexico are prepared with a herb called "Epazote"
which is used in Mexican cooking (not sure for what other applications because it is absent from my mother's Mexican cooking) I'll be honest I don't know much about the herb, I just wikipedia'd it (yeah I know that's not a word) and linked it so you guys can read it if your interested.
Well anyways, I went to the grocery store and saw a big bunch of fresh Epazote and I don't know what got into me but I said, "Hey I've heard black beans with epazote are delicious never have made it but I guess I'll try it and see how it goes" and I did.
I will be honest with all my readers, I do dislike Mexican "Frijoles de la Olla" type dishes (bean soups prepared the traditional way which I feel is a little bland and watered down, that is the reason I tend to always when I make them I simple drain them and fry them then mash to a delicious savory paste. (can you blame me I was raised on thick and rich Cuban and Spaniard bean/ legume based stews). For my blog I prepared them watered down to keep it traditional and how most Mexicans would like it, but for my house I almost always make bean soups/ stews thick, or water if I wish to refry them or use them to make "Enfrijoladas"
But I still wanna show my reader's what I know so here goes I will show you how to prepare "Frijoles Negros Con Epazote" and I know many people like stuff prepared like this :)
Ingredients:
-2 cups black beans
-1/2 big onion or 1 medium one cut in half
-2-3 cloves garlic whole
-1/2 a big bunch of Epazote cleaned and tied so you can easily remove it
-water
-salt Directions:
(1)Get beans, run your hands through them to get rid of anything that may be hiding in them, rinse well and place in a pot.
(2)Add water enough to cover about 1-2 inches and throw in garlic, onion, and epazote bring to boil and simmer for about 2 hours more or less depends on your beans
(3)When done cooking throw away and remove garlic, onion, and epazote, add salt to taste and let boil another 3-5 minutes.
You can enjoy as a soup, eat with rice or tortilla, good side dish to most Mexican meals (meats, etc.) but I DIDN'T WANNA EAT IT PREPARED LIKE THAT SO I REFRIED IT:
Ingredients:
-Prepared cooked "Frijoles Negros Con Epazote"
-1/2 onion minced
-4 teaspoons more or less "lard" or "bacon grease"
Directions:
(1)I like my black beans really smooth so I put them in a blender and dilute with some of the black bean broth. Set aside. (You can do this in batches)
(2)Now heat a pan on medium high heat, add lard or bacon grease, when it melts and it's hot add onions and brown them until translucent and cooked down a bit on medium high
(3)Now add your black beans that you blended and stir until they come to a boil, let it reduce on medium heat stirring occasionally so it doesn't stick until it reaches the consistency you desire.
(4)Serve as a side with whatever, I went stereotypical and melted cheese over them and ate them with some corn tortillas and a spicy sauce. (yes people I love beans and cheese with tortillas heck I love beans! If you haven't noticed I have tons of bean recipes in my blog haha)
Steamed Vegetables with Vinegar and Soy Sauce dip
Haha yet another thing I learned from my Filipino friend's (Shantall) mother (Herminia). Her mother loves vegetables and usually makes sure that there is always vegetables incorporated into the meal, be it a side dish or within a specific dish.
She sometimes makes a very simple vegetable side dish, she simply steams vegetables (be it broccoli, cauliflower, wedged cabbage, etc.) and will make a vinegar soy sauce dip.
I recommend this if you are ever in a hurry and want some healthy vegetables to eat with your meal.
This has become a regularly prepared thing in my house when we want veggies quickly and have broccoli, cauliflower, or cabbage on hand.
Main Ingredients:
-(whatever veggie steamed I've had this prepared with either cauliflower, broccoli or wedged cabbage or a combination of broccoli and cauliflower)
Dipping sauce:
-soy sauce
-vinegar
Directions:
-In a pot boil some water about 1-2 inches of it, then add veggies cleaned and cut to steam, when ready and they change color check it's doness and if it's good, drain and set aside.
(2)Mix equal amounts vinegar to soy sauce (like 1 tablespoon soy sauce you add 1 tablespoon vinegar) that's how I do it, but it's really to taste.
(3)That's it just get a veggie and dip and eat, it's that simple, trust me! It's good and simple.
PLEASE NOTE:
-This is delicious with boiled whole okra, just get young fresh okra, boil a pot of water, and boil whole until they just change color a bit, drain and serve with dipping sauce you may shock them in cold water if you wish. Very addicting for me.
P.S.
-I know it may sound weird or akward to some but try it, you may like it and it's good for you :)
She sometimes makes a very simple vegetable side dish, she simply steams vegetables (be it broccoli, cauliflower, wedged cabbage, etc.) and will make a vinegar soy sauce dip.
I recommend this if you are ever in a hurry and want some healthy vegetables to eat with your meal.
This has become a regularly prepared thing in my house when we want veggies quickly and have broccoli, cauliflower, or cabbage on hand.
Main Ingredients:
-(whatever veggie steamed I've had this prepared with either cauliflower, broccoli or wedged cabbage or a combination of broccoli and cauliflower)
Dipping sauce:
-soy sauce
-vinegar
Directions:
-In a pot boil some water about 1-2 inches of it, then add veggies cleaned and cut to steam, when ready and they change color check it's doness and if it's good, drain and set aside.
(2)Mix equal amounts vinegar to soy sauce (like 1 tablespoon soy sauce you add 1 tablespoon vinegar) that's how I do it, but it's really to taste.
(3)That's it just get a veggie and dip and eat, it's that simple, trust me! It's good and simple.
PLEASE NOTE:
-This is delicious with boiled whole okra, just get young fresh okra, boil a pot of water, and boil whole until they just change color a bit, drain and serve with dipping sauce you may shock them in cold water if you wish. Very addicting for me.
P.S.
-I know it may sound weird or akward to some but try it, you may like it and it's good for you :)
Monday, December 22, 2008
Herminia's Chicken Adobo
This is another one of those recipes I learned from my friend Shantall's mother. It is chicken cooked in a savory but slightly sweet and tangy sauce made if vinegar, soy sauce, and sugar and it has lots of delicious garlic and potatoes.
I have seen lots of Filipino chicken adobo recipes and I have had Chicken adobo from other Filipino people and places, but I really like Shantall's mom's version of Chicken Adobo.
Serve this with hot jasmine white rice and whatever other side dishes you'd like :)
Main Ingredients:
-1 whole chicken (cleaned, cut into sections, skin on)
-salt to season chicken to taste
-soy sauce a bit to season chicken just to give color a couple light splashes
-pepper to season chicken to taste
-1 onion julienned
-1 head of garlic, cloves peeled left whole
-4 potatoes, peeled and cut into chunks
-Olive oil
Ingredients for the sauce
-1 1/2 cups water
-1/2 cup white vinegar more or less to taste (they use cane, or coconut vinegar, white distilled works here to)
-1/2 cup soy sauce more or less to taste
-1/2 cup packed dark brown sugar more or less to taste (I use 1/2- 3/4 sp does Hermi but some people like using less like 2 tablespoons it's to taste)
-6 small bay leaves (or 3 big ones)
-1 teaspoonful of black peppercorns
-salt to taste (if needed)
Directions:
(1)Wash the chicken and clean well, (you could wash it with vinegar and salt and then rinse well again) now put in a bowl cut into medium sized sections, LIGHTLY season with salt, pepper, and soy sauce (big emphasis on lightly remember the sauce has salt to, just enough soy sauce to give color and light on the salt) now set aside.
(2)Mix sauce ingredients EXCEPT black peppercorns and bay leaves. Taste it, if you'd like add more soy sauce or sugar or vinegar this is all to your taste, the proportion of vinegar, soy sauce and sugar is all to taste set aside.
(3)Heat olive oil in a deep-pot on medium high, sautee onions and garlic until browned and onions are a bit translucent, add chicken and stir and let it release some juices and change color a bit.
(4)Add the sauce ingredients and bring to a strong boil on high, add bay leaves and whole peppercorns, cover and simmer on medium low for about 30 minutes.
(5)Add potatoes, taste if it needs more salt, soy sauce, vinegar or sugar and you can add more to taste, but it should be fine I added a little bit more salt to mine didn't wanna over power with soy sauce. Boil for another 10-15 minutes or until potatoes are tender.
(6)Now your done, enjoy!
NOTE:
The chicken skins are for flavor you don't have to eat them when your eating the dish you remove and set them aside as you eat.
I know it seems like a lot of soy sauce and vinegar but it's diluted with water, and she likes to add a lot of potatoes to it so they thicken and soak up the sauce.
Ginataang Kamoteng Kahoy (Cassava Root in Sweet Coconut Milk)
I have never cooked Cassava (Yuca) in a sweet way. On Saturday I went to my friends house (Shantall) who is Filipino and her mother had this delicious Yuca in coconut milk that was sweetened with sugar. I fell in love with it, why wouldn't I after all it is also one of the most loved starchy root vegetables Cubans love. I could have never imagined it sweet, but let me tell you it is amazingly delicious and comforting for something so simple to make.
So anyways, this week a had bought 2 medium fresh Cassava roots that were on sale, let me tell you how to pick them. You should choose one that is firm, doesn't have tooo many lines all over, and also to check if it's good you.... GASP.... have to snap off a bit of the top part, if you snap it off and it's firm, and white the root is good inside. (Haha atleast I snap only a bit of the top this Peruvian lady at the store snapped it in half haha and if it was not good back to the shelf haha.) or you can take the really practical easy way out and buy frozen Yuca that is peeled.
I bought the fresh one though because it was so fresh and good, after peeling the Cassava I picked it was perfect white and beautiful.
So on seperate note to all my fellow Cubans reading this I suggest you give it a try I know you'll like it :)
Ingredients:
-1- 1 1/2 lbs. Yuca (frozen or fresh)
-1 can coconut milk
-3/4 cups white sugar (more or less to your taste)
-water
Directions:
(1)If using fresh Cassava root, have a pot with water on the side, cut the Yuca into 3 sections, lay it on it's flat round side, and with a knife cut off the peel, cut in half, then place in water to prevent discoloration. (I peeled both Yuca's but I only used 1 and a piece of the other, the rest I froze it so I can use it soups or steam witha Cuban garlic lime sauce)
(2)Now drain it and wash Cassava, add water just enough to BARELY cover, bring to a boil on high and cover to cook on medium heat until tender but not falling apart, you will see the Yuca will sort of open a bit.
(3)Now when Yuca is tender, crank up heat to high, add coconut milk, and sugar to taste now bring to a boil and let it boil uncovered on medium heat for about 5-10 minutes.
(4)Enjoy this simple, comforting, and delicious dessert.
NOTE AND WARNING:
-Do not consume raw cassava root/ yuca/ yucca whatever you wanna call it (we call it Yuca in Spanish) it is very poisonous when raw, and will turn into cyanide in your body and kill you, it's strong enough to knock out a cow ha ha. So unless you wanna die don't taste it raw :) but when cooked it is perfectly safe and delicious.